There are no products listed under this category.
Shop by Category
EK Magneto Rx
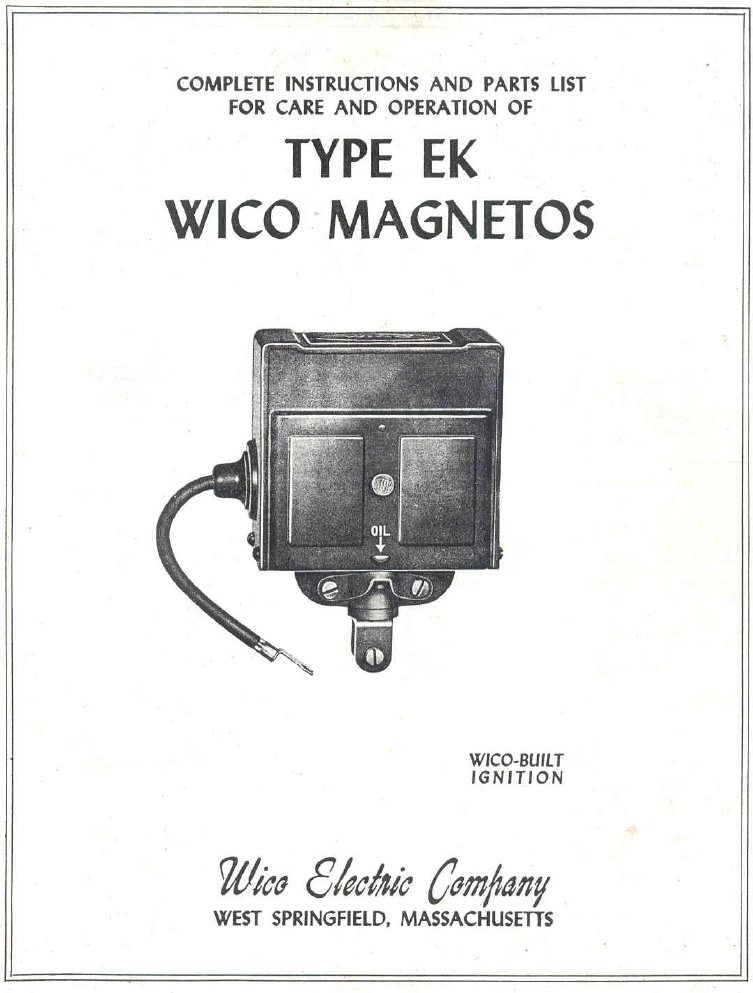
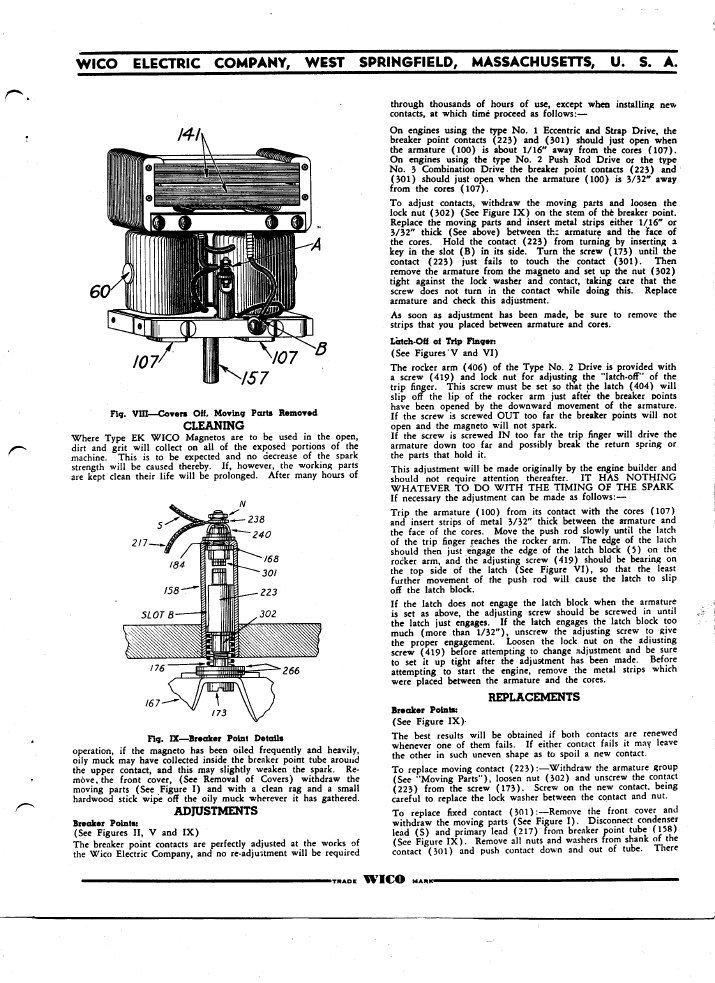
Wico EK: A famous and sometimes very annoying Wacky Wico: When in any state of repair, they work great with these old slow speed stationary engines. They just got no respect, seldom oiled, often let get wet, caked with dirt and dust,neglected and improperly installed. This goes on my Stover CT1 Empire Milking machine. Note homemade gap gage in place. Here are some tech tips from the college of hard knocks and later to follow the factory service manual.
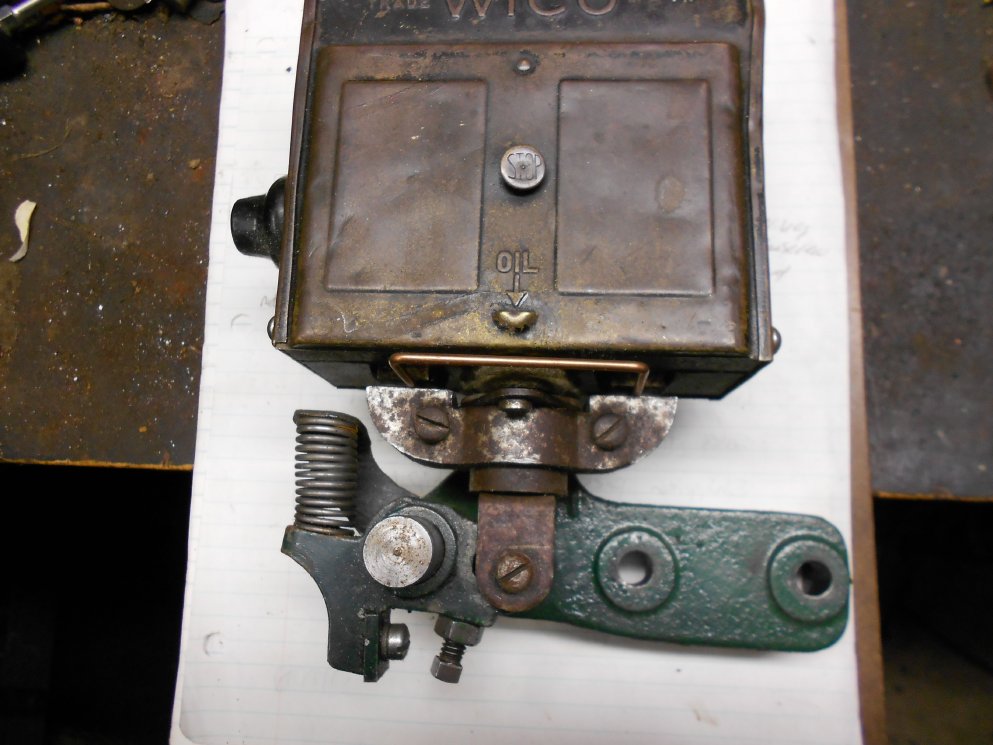
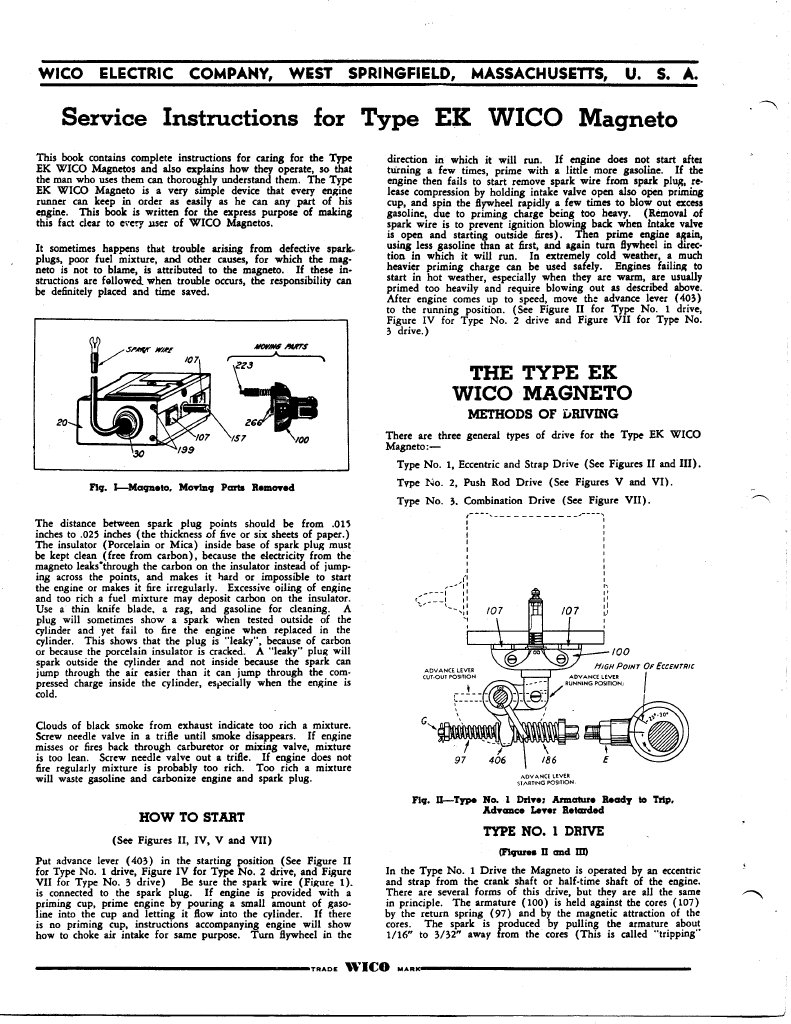
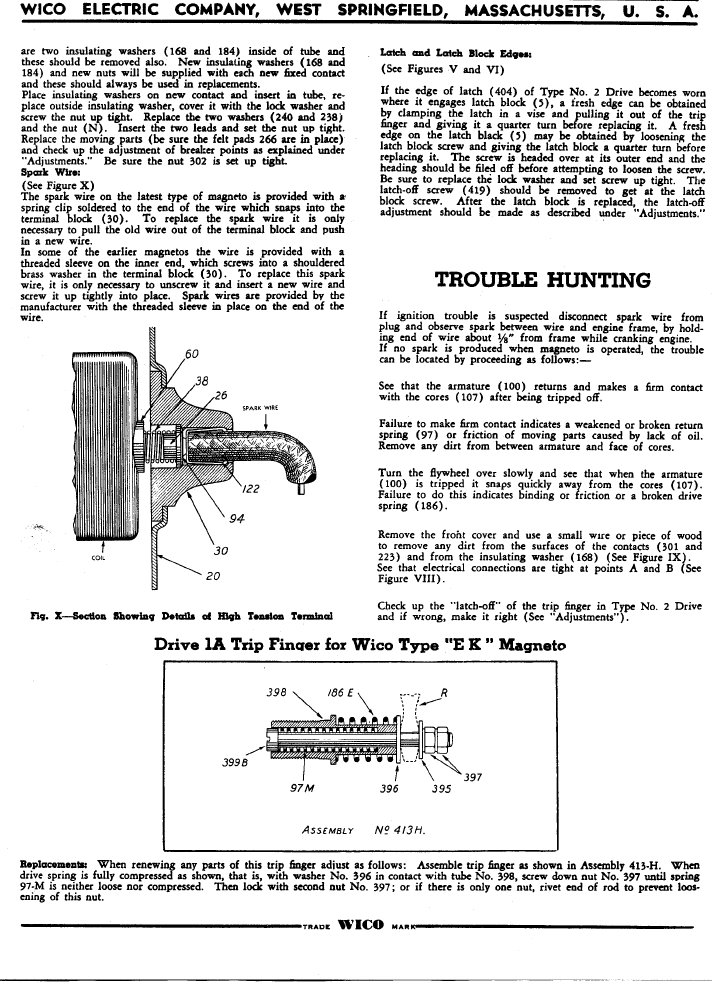
Is your Wico EK wimpy ? Here is relief or at least some sympathy for those who dare venture into this Wacky Wico. The first task before we disembark is to see if indeed it is a spark issue. The service manual describes holding the plug wire connector 1/8" away from the chassis or metal engine parts then crank it over looking for a spark . Recall that spark at the plug does not tell the whole story. It takes far more voltage output to jump the gap at the plug under compression with a fuel/air mixture. Also be sure and use non resistor plugs and wires to prevent damage to the coils. Fouled plugs with modern fuel will also act like magneto issues too.
Dirty or pitted points cause the most grief and failures. The Wacky Wico point contact surfaces may have grown barnacles (usually nonconductive metal oxides) since the last time it fired. Use a fine stone or diamond file (the purple Easy Lap works great) to get the jagged edges if any off. It seem like everyone has a "points file" in their toolkit, but they usually are far too coarse and do more harm than good. Point material and metal oxides thereof are often harder than the file anyway. If the contacts are dirty and not rough, I like a red "Cratex" abrasive stick. It looks like an eraser but has abrasive in it. MSC industrial supply has these and the easy lap, and about everything else you may need in a machine shop or restoration project. The red is a medium grit and the slate is a fine grit. Use the red to get the blemishes off and the slate to get a mirror finish. they come in rectangles and in round rods. The small round rods work well for cleaning the points inside the tube of the EK. Larger Cratex rods work well for cleaning light sockets and fuseholders (good tool to carry in the car or RV). Smooth contact surfaces will stay cleaner longer than rough ones. You can usually tell where the contact material is spot welded or hard soldered to the steel points parts. Steel does not make a good point material and will soon fail. If the contact surfaces have worn through to the steel, best to replace the points. If there is still "meat" left on the point contacts after dressing, run them. If the contact material wears through, usually you will see a reddish copperlike tinge of the solder connection between the tungsten or platinum wafer of contact material. Whenever cleaning points, always be aware of the residual abrasive dust left behind. It is helpful to use brake or contact cleaner when finished and pull a piece of paper between the closed contact surfaces to remove any residue left from cleaning.
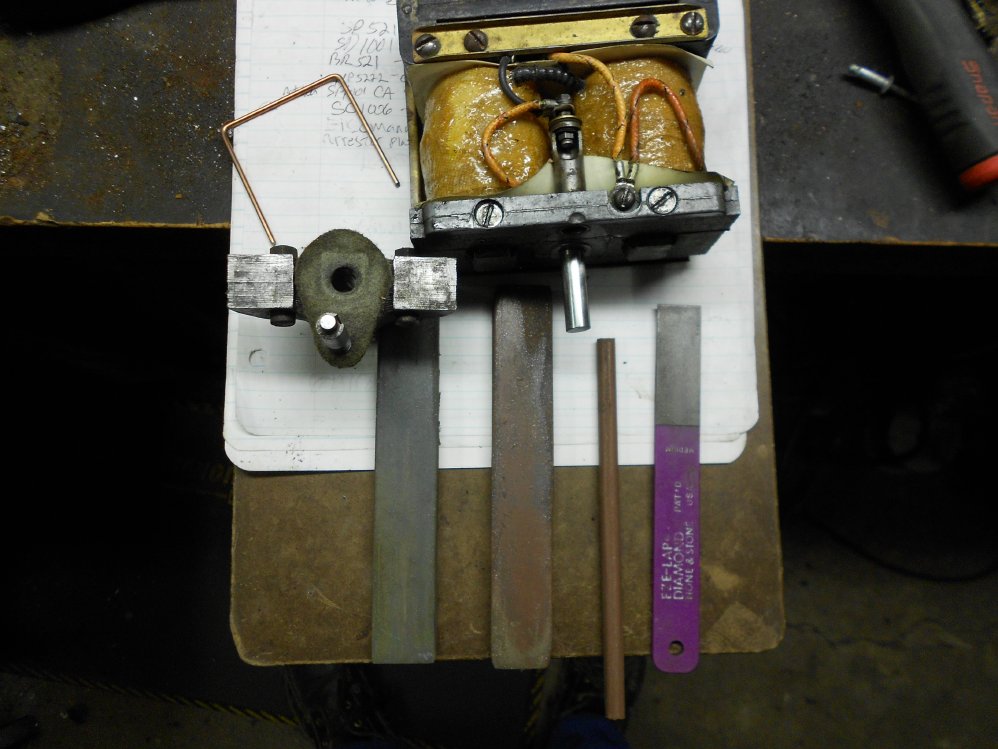
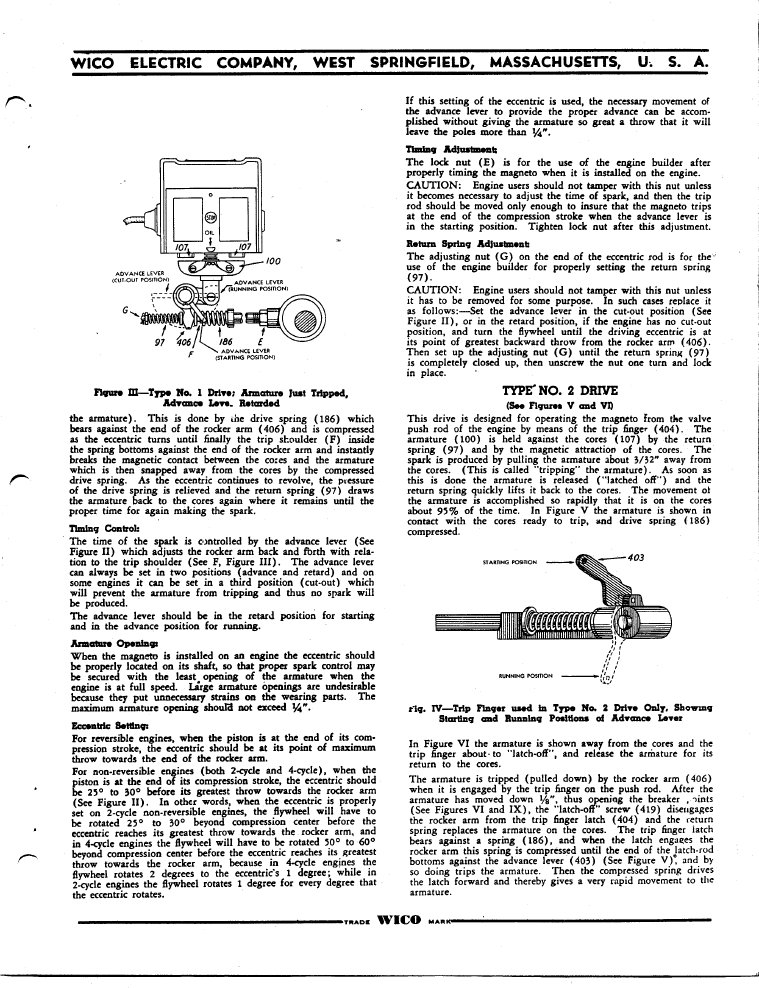
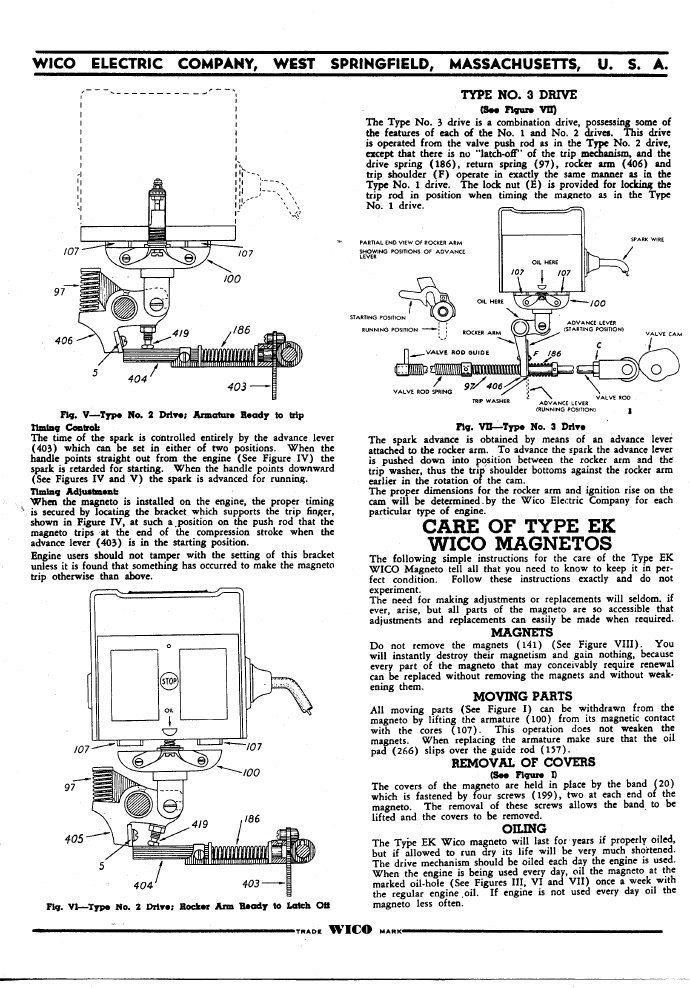
Next be mindful of the points clearance, that is clearance from the underside of the screwhead that threads into the movable point and through the armature bracket . When the armature is pulled away from the pole pieces by the rocker, the magnetic pathway breaks, then the electric pathway breaks when the armature pulls the point adjusting screw away unseating the points breaking the electrical circuit. The interval between where the magnetic pathway is broken and the electric pathway through the points is interupted is referred to as edge gap. This must happen quickly ("tripping) to make a spark. The clearance varies by the trip mechanism of the engine. The service manual describes 3 trip mechanisms, this is a Stover CT1 with the type 3 drive and clearance is 3/32" for types 2 and 3. One way to do this is to take a 3/32" gas welding rod and make a u shape to put between the armature and pole pieces,then adjust the points so that the underside ofthe adjusting screw just touches the armature bracket.This tool is shown to the left of the magneto. A quick and dirty way to check the point clearance is to see if a drill shank the correct size (3/32" for the Stover) will fit between the underside of the screwhead and the armature.
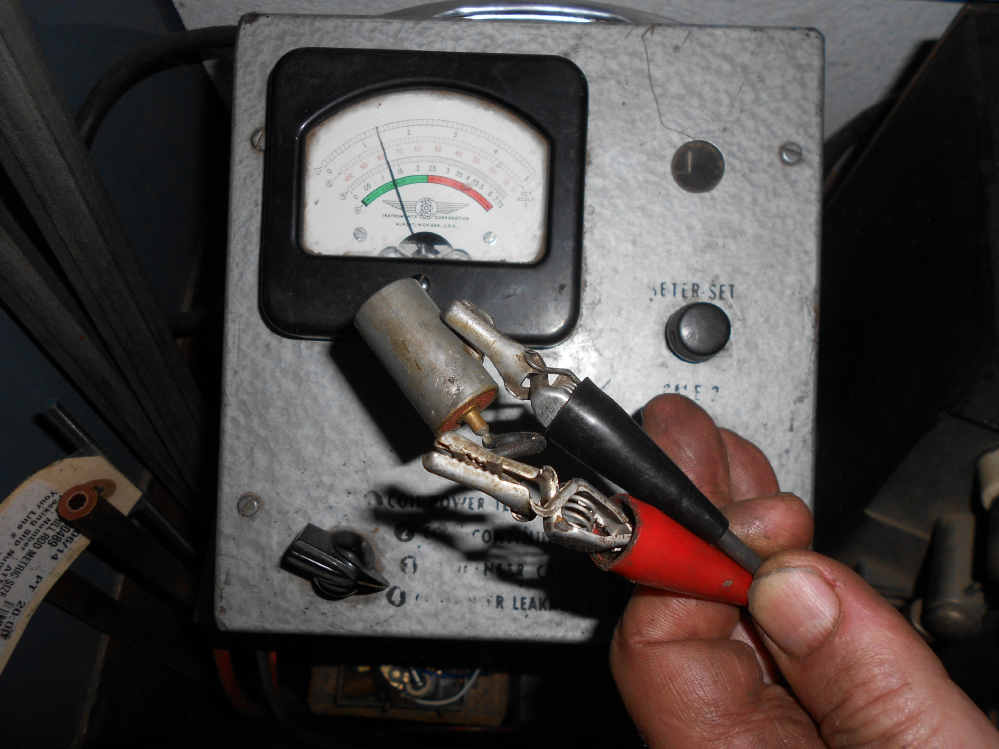
If all is well so far, the next step is to check the condenser. Mechanics call it a condenser and electrical engineering types call it a capacitor. In ignition circuits it reduces sparking at the points and intensifies the spark at the plug. It stores electricity and damps out ringing in the coils. Inside the metal case are essentially two metal foil plates, one connected to the case and the other to the pigtail sandwiched together separated by an insulator material, usually paper in early designs. If moisture enters the paper it ceases to be an insulator able to hold a charge between the plates because the wet paper partly conducts electricity and leaks away the stored electricity . This is a very well used vintage Mercotronic coil and condenser tester. When the condenser leakage test button is pressed, it applies about 200 volts DC through the device and measures the current. A good device will show a rapid inrush of current and when the device is fully charged the current will drop to near zero(far Left hand side of meter scale). According to Mercotronic, a small amount of leakage is allowable as indicated by the green band on the scale. My former professors feel that no leakage is desireable. Once the device is fully charged there should be zero current flow and the needle should be to the far left at zero.Presence of leakage will overstate condenser capacity. The red band to the right on the meter scale means that there is excessive leakage or a short. This device shows an acceptable amount of leakage. Leakage is the first and most often used test in practice as noted by the wear on the switch labeling.
Over time the devices of days gone by may absorb moisture and become leaky, shorted or open. A shorted condensor will act like the pigtail is connected directly to the case. An open condenser will act like nobody is home, like two wires in one room going nowhere. Old condensers in the EK are nearly always defective, especially in the Northwest where it rains and occasionally stops. If you have a condenser tester best to check for shorts and leakage first, if there is leakage, replace it. It will not get better with age and will cause hard starting,poor performance and pitting at the points. A leaky condenser will give false readings on a capacitor tester or a condenser test attempting to measure capacity. If there is no leakage then test for capacity, an open condenser will have no capacity value. They are usually about 0.2MFD capacity at a rating of about 400 volts. Radio Shack has a capacitor that works well for replacing odd shaped OEM condensers and is about the size of a chiclet, or can get an automotive condenser like for a 1950-60's Delco distributor and install as shown. The automotive condenser is better suited to this replacement. Modern condensers typically use a polypropylene (plastic polymer) film as an insulator in lieu of paper that does not tend to absorb water and leak in normal use. Best not to solder directly to the capacitor case as it may damage the seal that keeps the moisture out. Use a piece of wire and a ring connector with a screw through the mounting strap to connect to ground (magneto frame or housing). Snip off the spade or fork connector from the pigtail, strip about 1/4" of insulation, then slip the wire under the small brass flat washer and tighten the nut. Give a light tug on the coil and condenser wire to be sure they are snug to the points terminal. Be carefull not to lose the nut on the points terminal, it is a weird thread. Speaking of which, the points adjusting screw and locknut look like a standard 8-32 thread, but it is actually 8-36.
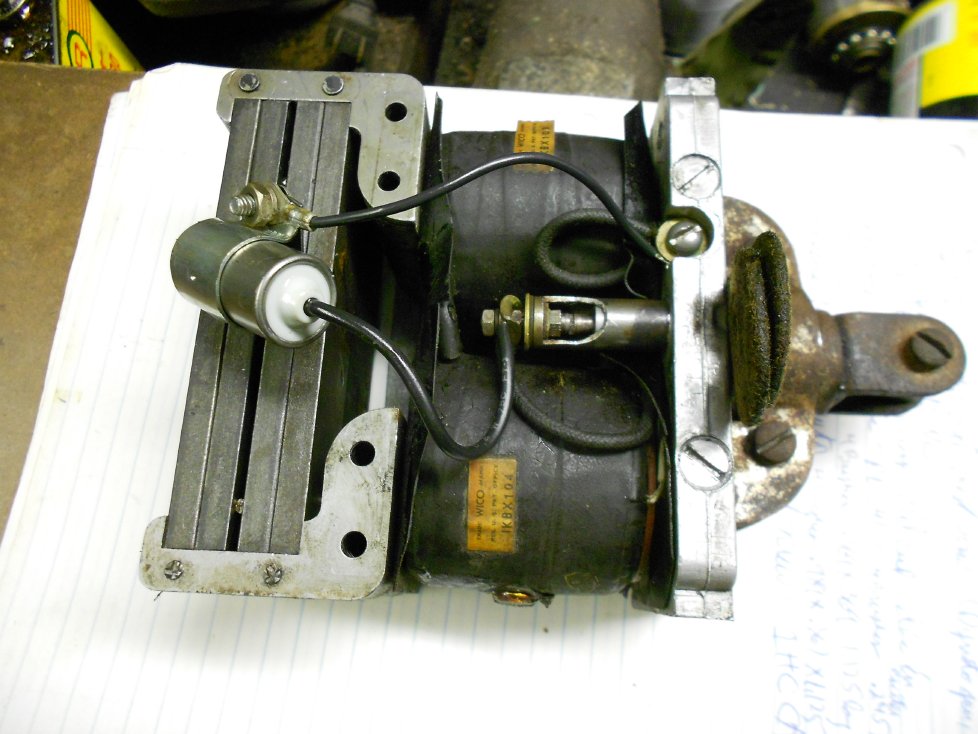
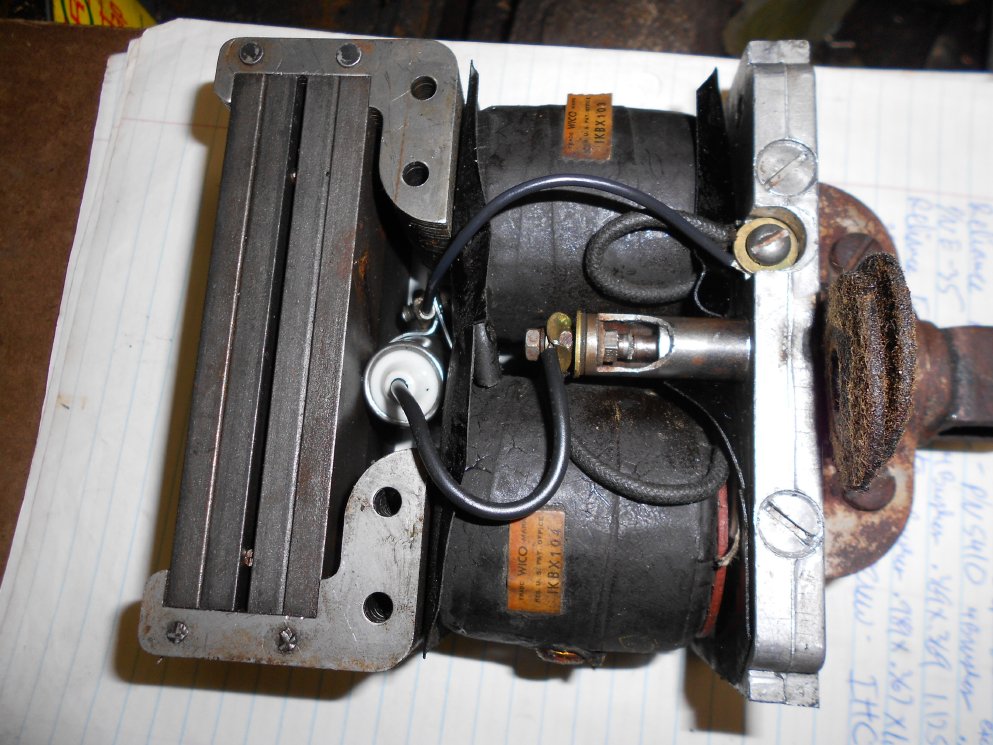
This makes a near bulletproof installation. Automotive condensers are designed for this service and the usual vibration,heat and grease under the hood. This EK is over 90 years old and with some minor righteousness and a new condenser will be back on the job at the next Skamania County fair.
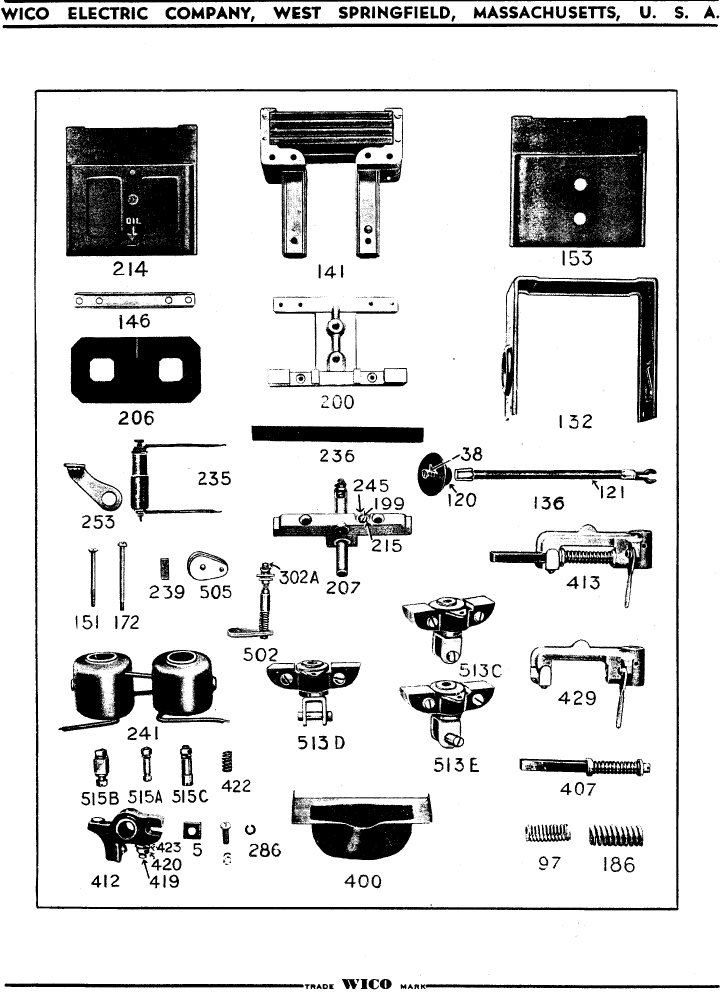
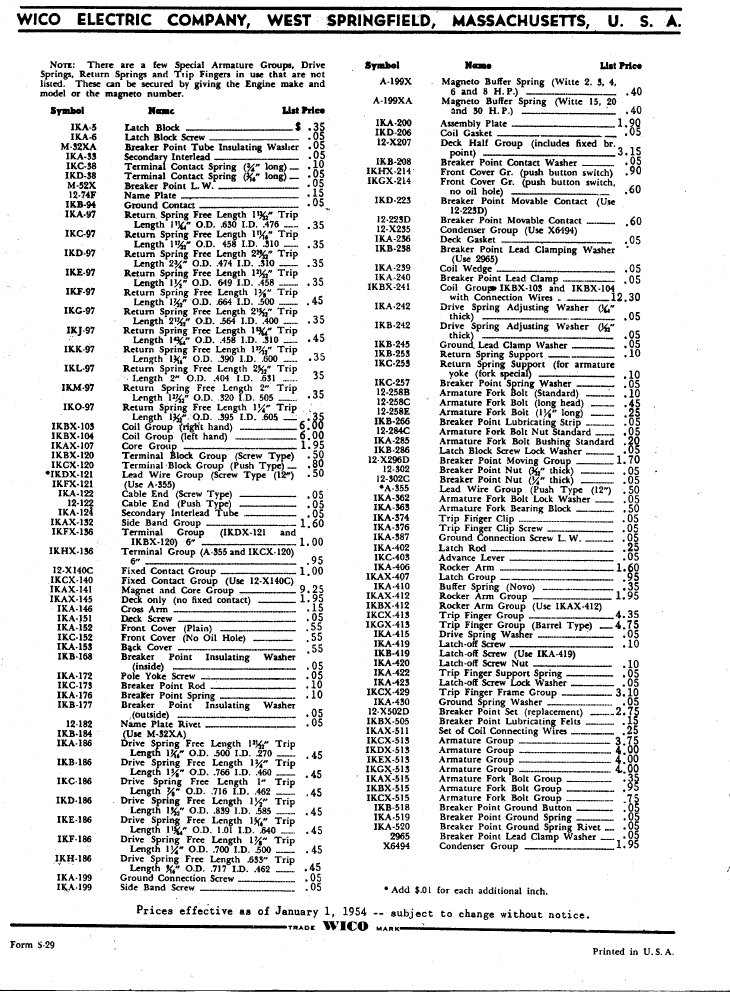
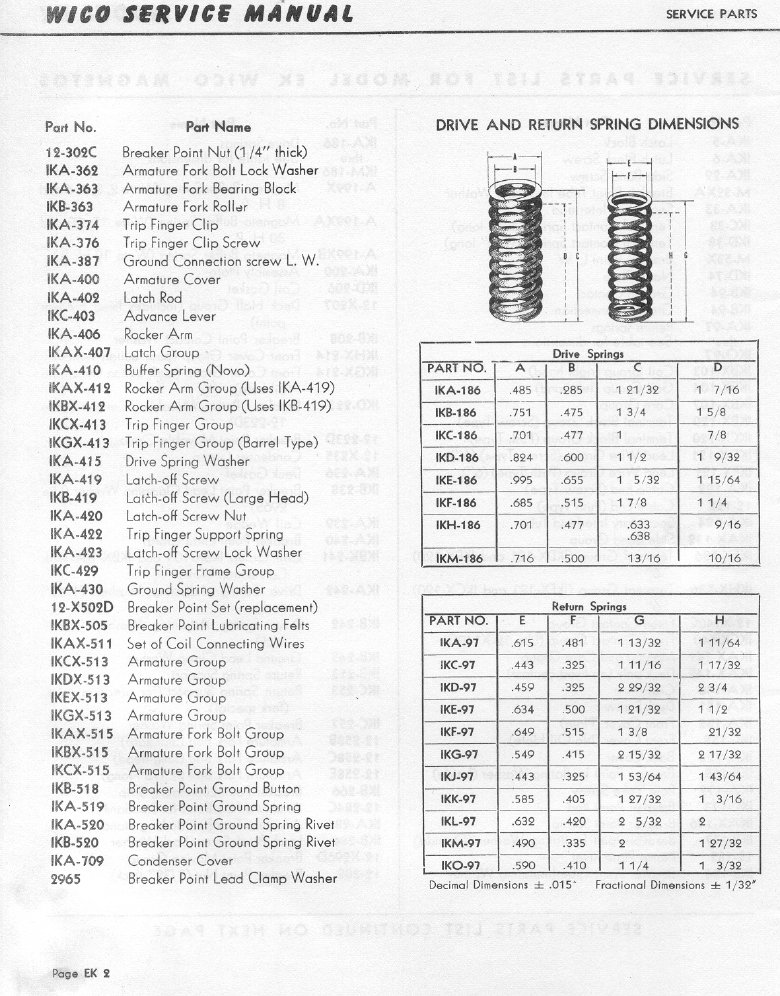
Here is the factory service manual to share with kind permission from Standard Magneto of Chicago. They can supply parts and even a new EK.
