There are no products listed under this category.
Shop by Category
XH and XHD Magneto RX
The Wico XH and heavier duty XHD probably appeared in the 1940's after the Wico C. The XH and XHD were a welcome change from the model C that had sleeve bearings that never got oiled, and a vulnerable 2 piece cap. The XH and XHD used a more robust and simpler cap and rotor, and a substantial sealed ball bearing on the armature shaft yet shared many of the impulse parts of the model C. The armature shaft is supported by a standard powder metal lubricant impregnated bushing inside that is much easier to service than the predecessors. The condenser is more robust and long lasting. The first coils supplied were a varnished tape wound device later replaced by a hermetically sealed device in a phenolic case. They appear as base and flange mount. There is also a special group of XH series mags used mainly by Caterpillar for pony motors discussed in a dedicated page to help keep you crawling and pushing dirt.
Most multicylinder models featured a small window to simplify timing by showing when the rotor is on #1 without taking the cap off. Most part are readily available, some even at auto parts jobbers. They are a modern serviceable mag.
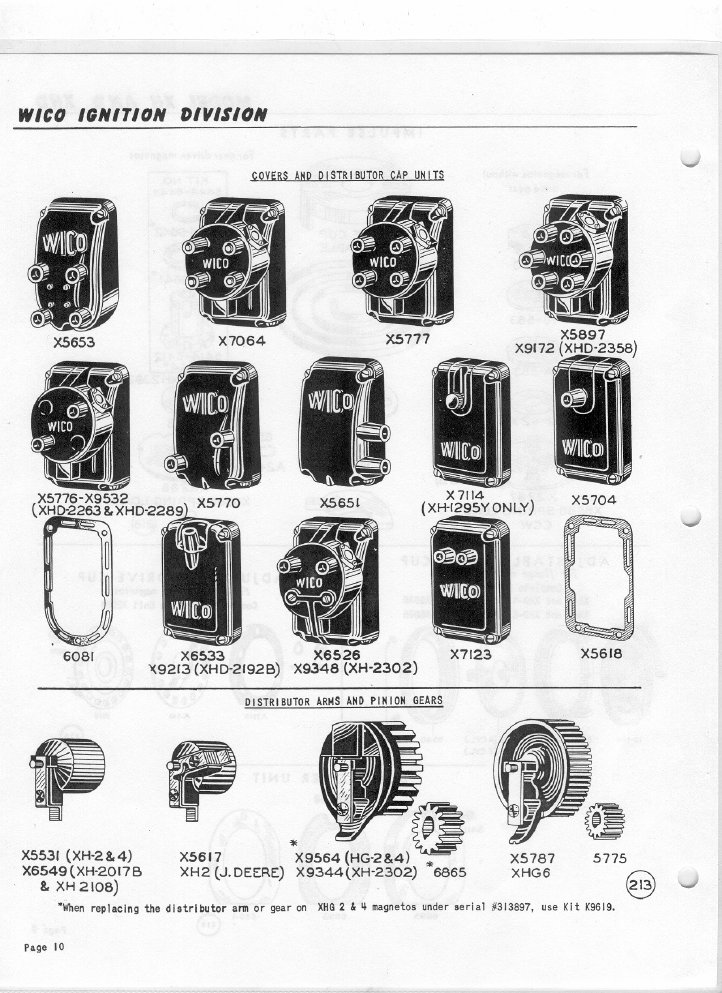
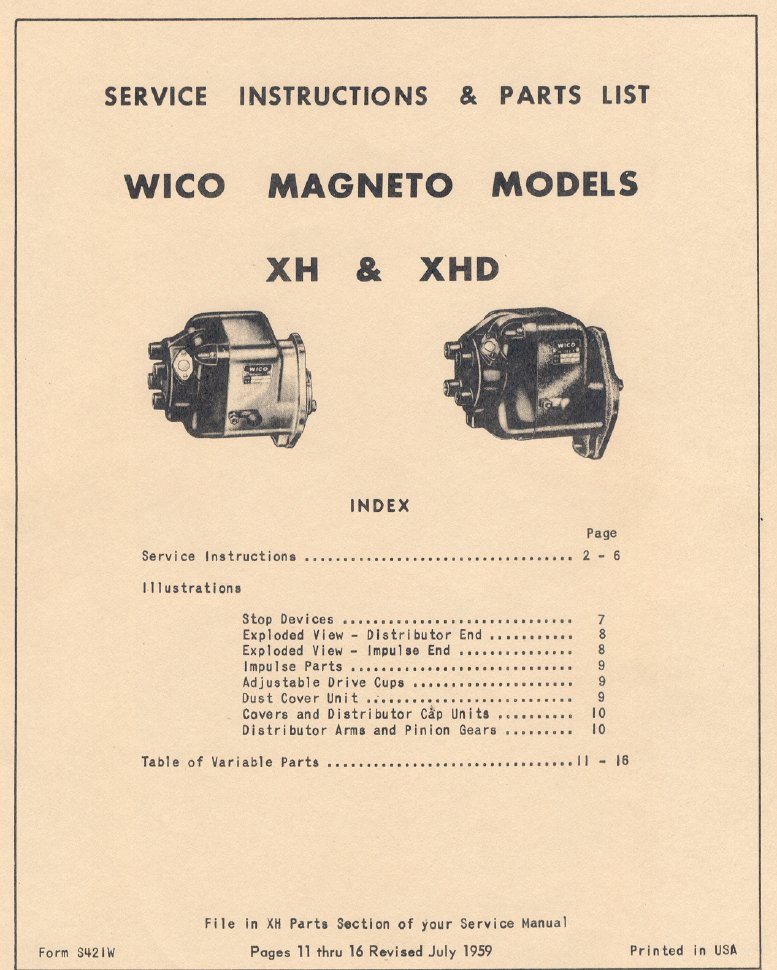
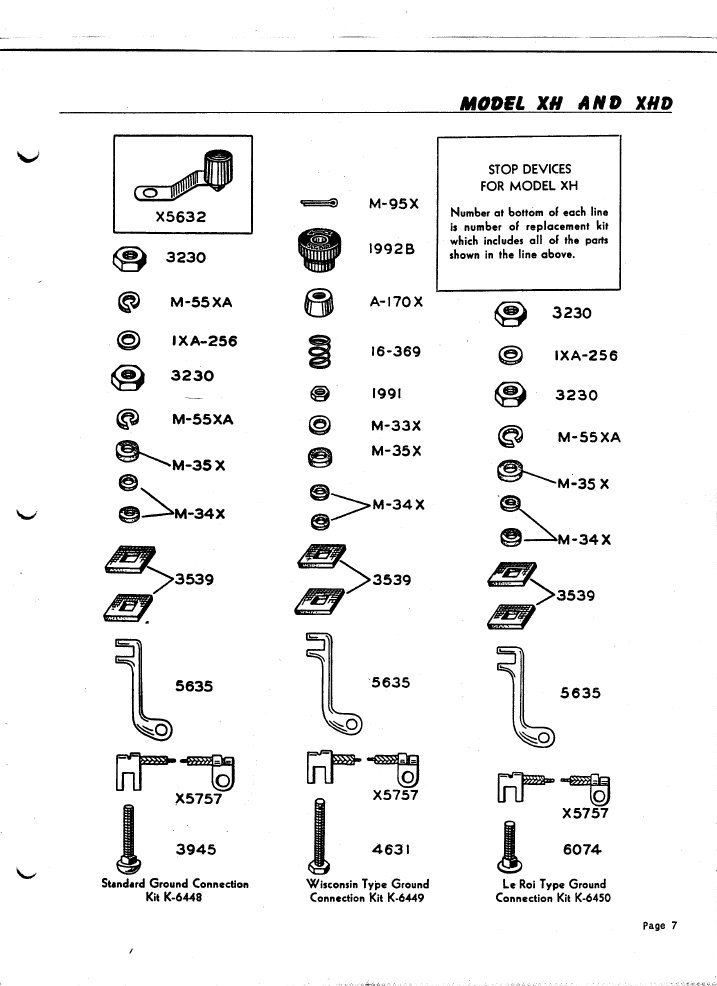
Here are some images from a service manual with kind permission from the staff at Standard Magneto to help keep yours well.
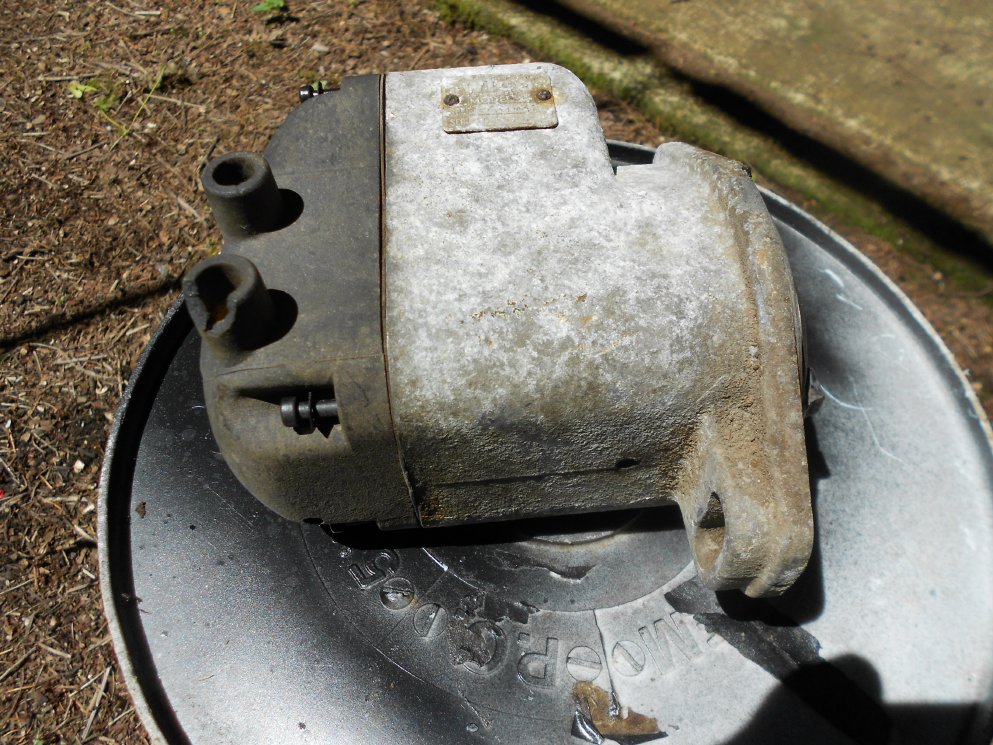
Here is a barn/field fresh specimen that got too much Oregon Rain in the wrong places, annoying but only a flesh wound. This configuration was used extensively by John Deere.
Patience is the key to getting these apart. If the distributor cap screws are stuck, let the housing have it with some heat from a propane torch. Point the cap downward and the flame
upward. this will make the aluminum housing grow and let go of the steel screw. Aluminum has a higher coefficient of expansion than steel. I like to chase the threads on the screws
and the housing and treat them with grease or anti seize. The distributor caps are often weathered from the occasional sun exposure here and there is an injury on one of the leadout towers but these although not beautiful will not affect the operation of the magneto.
The housing is indeed tarnished and corroded and many would abrasive blast it. If you do, best to do it lightly just to get the corrosion off.The corrosion is mainly aluminum oxides which are very hard (and used as blasting media!) and is hard to polish off. Get it looking good after blasting with a die grinder and a mild abrasive pad or Roloc and give it good shine.It will look sharp with your restored tractor and stay shiny a long time. Typically if left glass beaded it will have a mottled appearance and tarnish soon. When you blast it helps to thread screws and bolts into all threaded holes to keep abrasive out and of course mask bearings and machined surfaces. Grit in threaded holes will dull taps when you chase the threads.
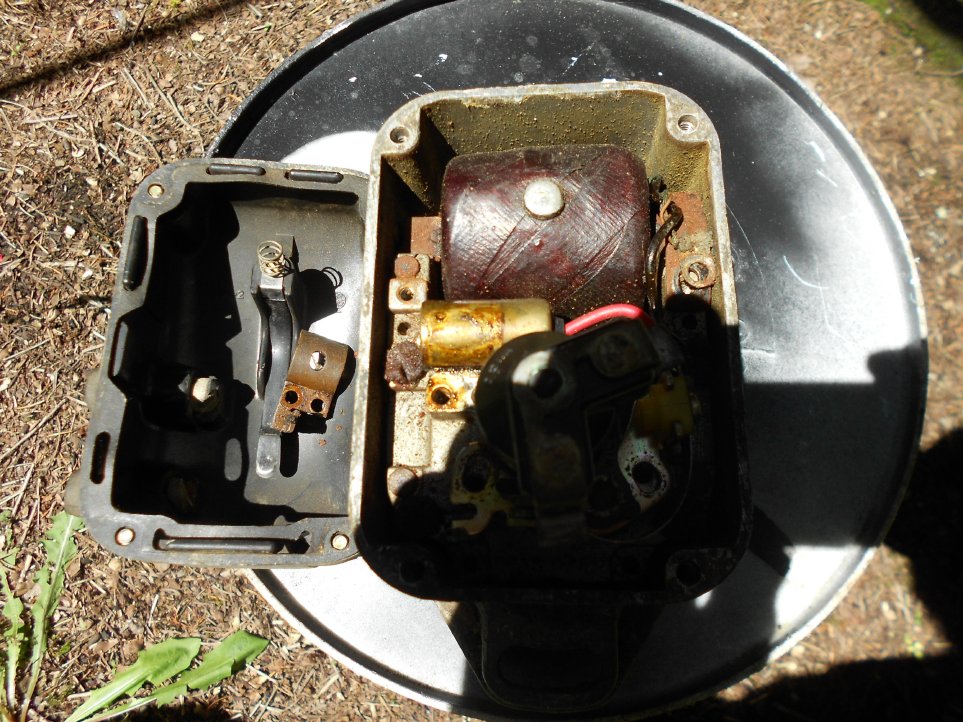
This is an earlier example with the tape wound coil. Looks like some stubborn screws ahead. An impact driver will usually break them loose, if not, add some heat. There are two
spring clips that hold the coil core in place. They sometimes crack and break but are readily available. Check the condenser for leakage and capacity, if leaky replace it, if not,
capcitance should come in around .18- .2 MFD. Not a lot of condenser issues with this model. This condenser checked out fine despite the appearance. Test the coil for output.
Coil looks bad, it was. They don't improve with age like wine and over time may soak up moisture and have fewer effective turns to induce sufficient secondary voltage to make
the fuel/air mixture go boom.
If the points still have meat on the contact faces, dress and polish them for another go. New old stock points contact surfaces occasionally need to be polished and aligned.
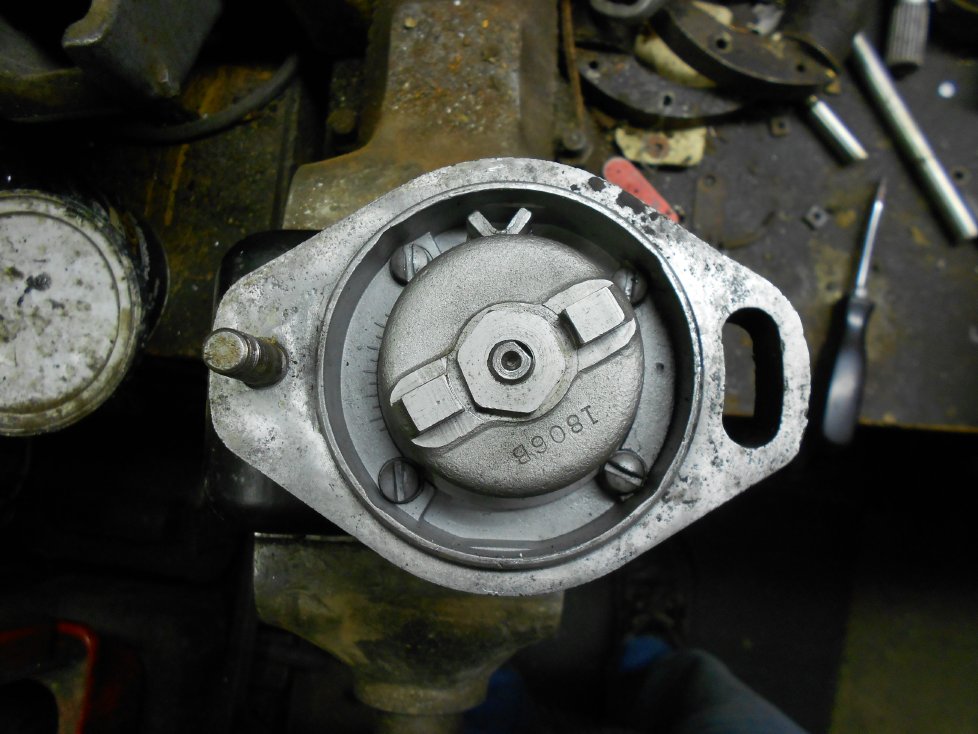
Note the four screws in the front and the witness marks below the stud bolt. The screws are size 12-28 and not easy to find, To get this critter apart, remove the screws, note the
relative position of the witness mark on the catch plate, and slide the rotor and impulse assembly out. If it does not come peacefully, give the magnetic rotor shaft a push
or smack with a non marring hammer. This is a good time to clean out the inside of the housing and wash the impulse assembly. I routinely replace the ball bearing. They are
often rusted or full of 60 year old petrified grease and inexpensive.
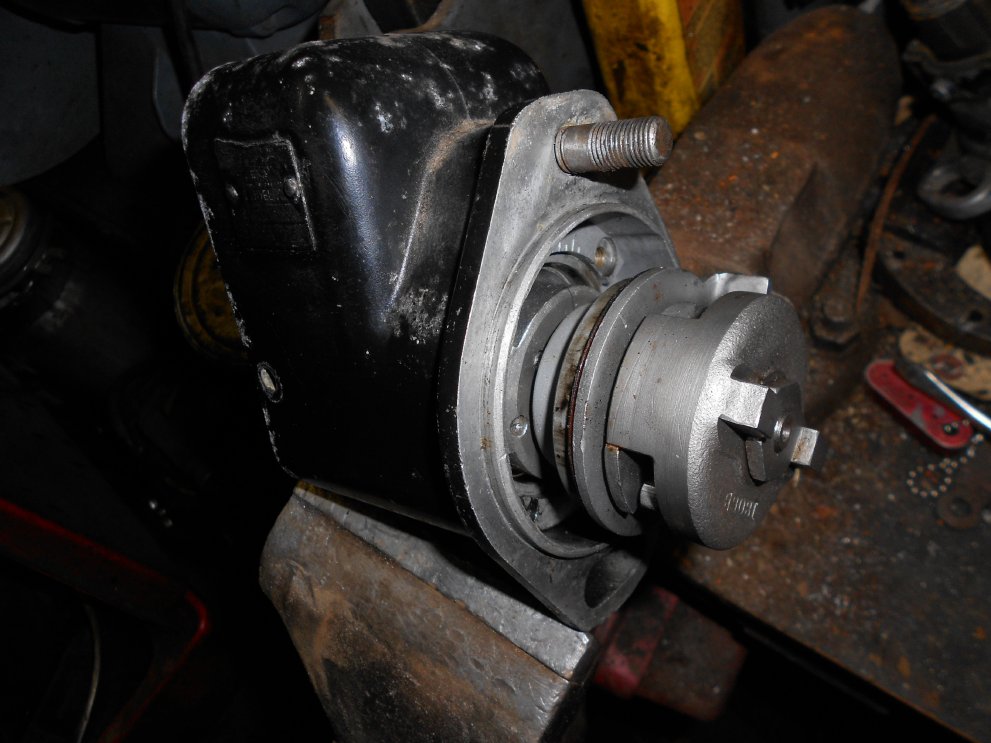
Things look a might narly in there. Good time to polish the breaker cam surfaces with crocus cloth and get any rust off the magnetic rotor and stationary pole shoes. Always keep the magnetic rotor away from any metal chips or filings. They are a pain to get off and will cause rubbing in the housing. Masking or duct tape can be used to get them off.
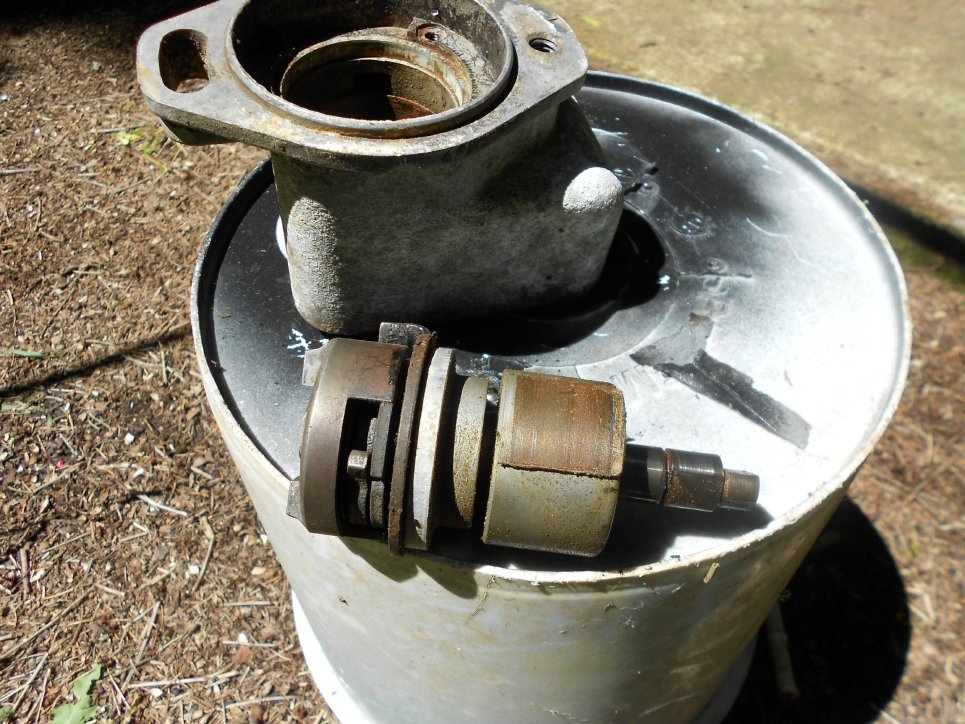
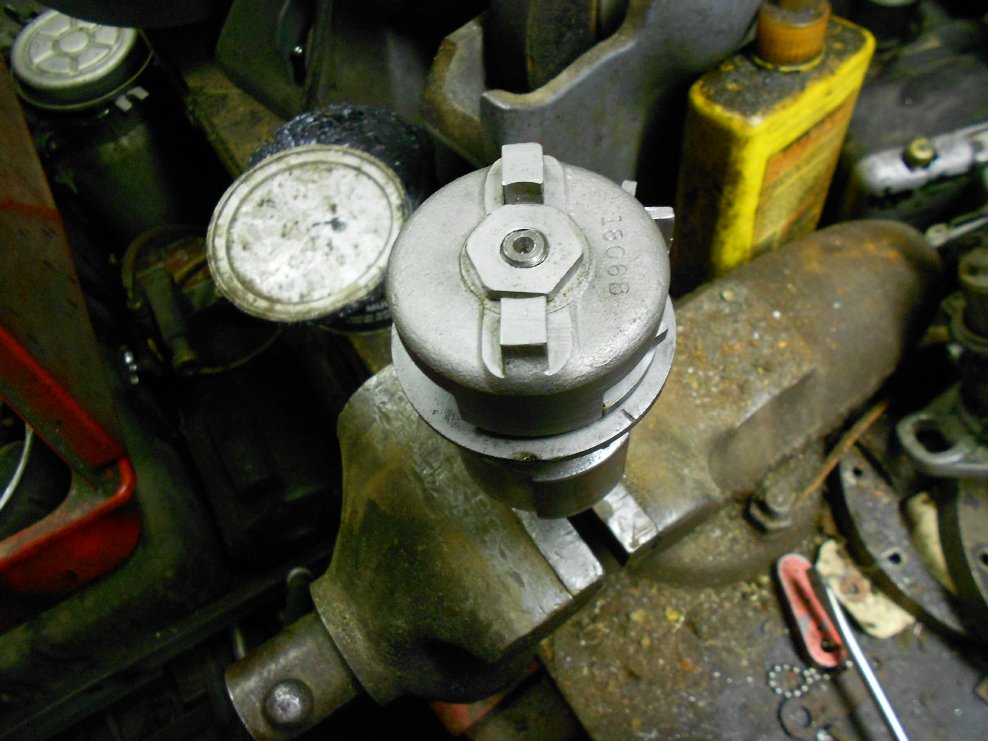
Gently hold the end of the shaft in a vise to service the impulse components and bearing. Loosen the nut and slowly unwind the impulse spring and pull up the drive cup.The
Wico service manual describes how to do this.
The XH and XHD are modern serviceable magnetos and widely used. Parts are readily available and reasonably priced. They are fairly straightforeward to service and rebuild well.
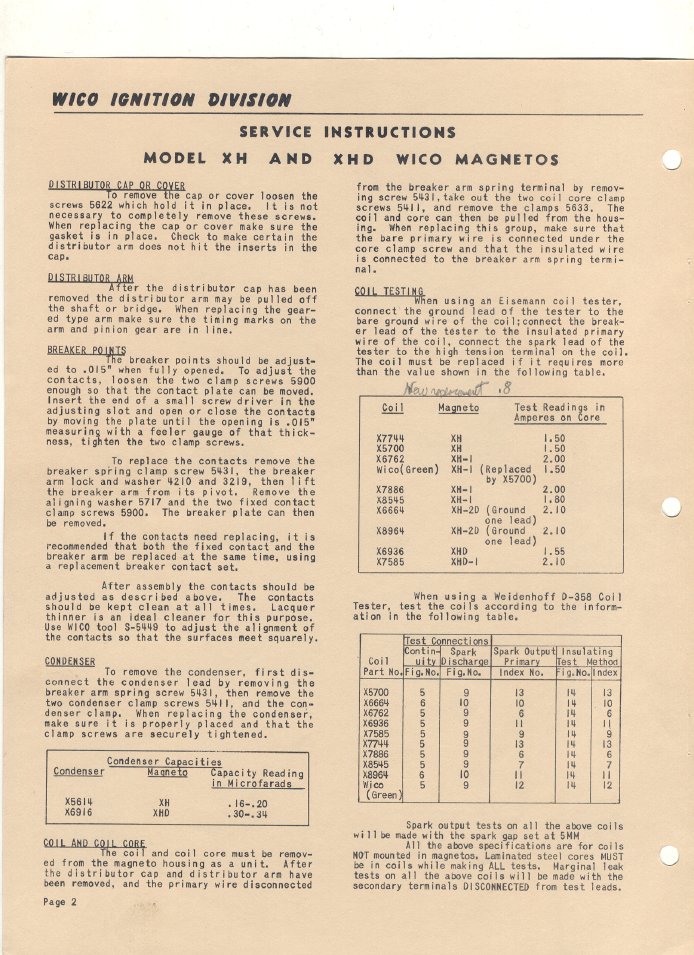
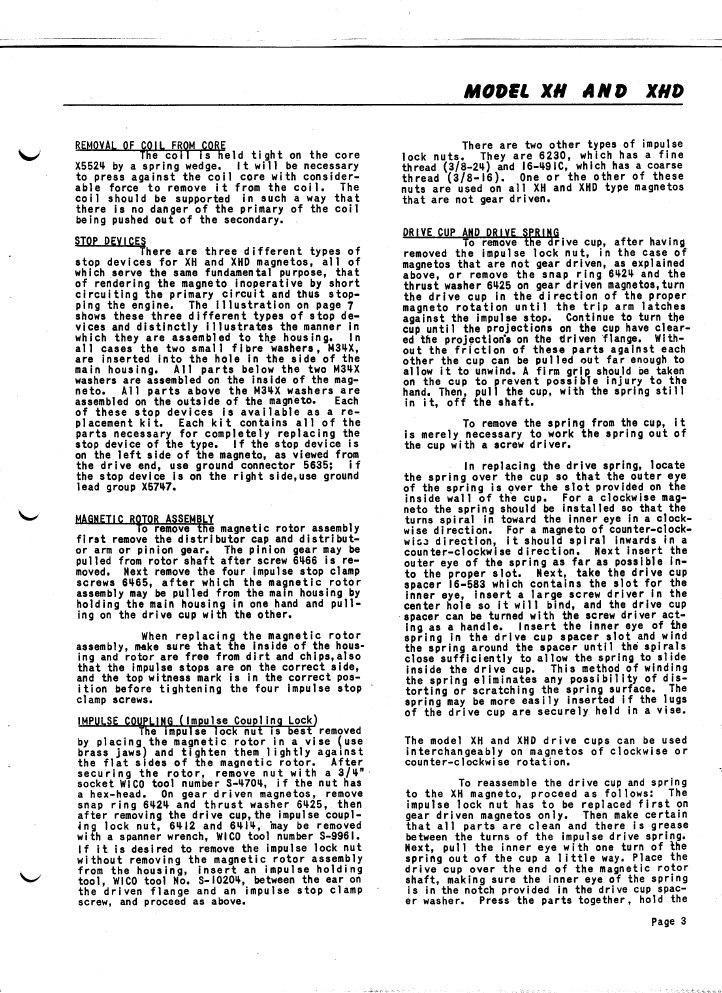
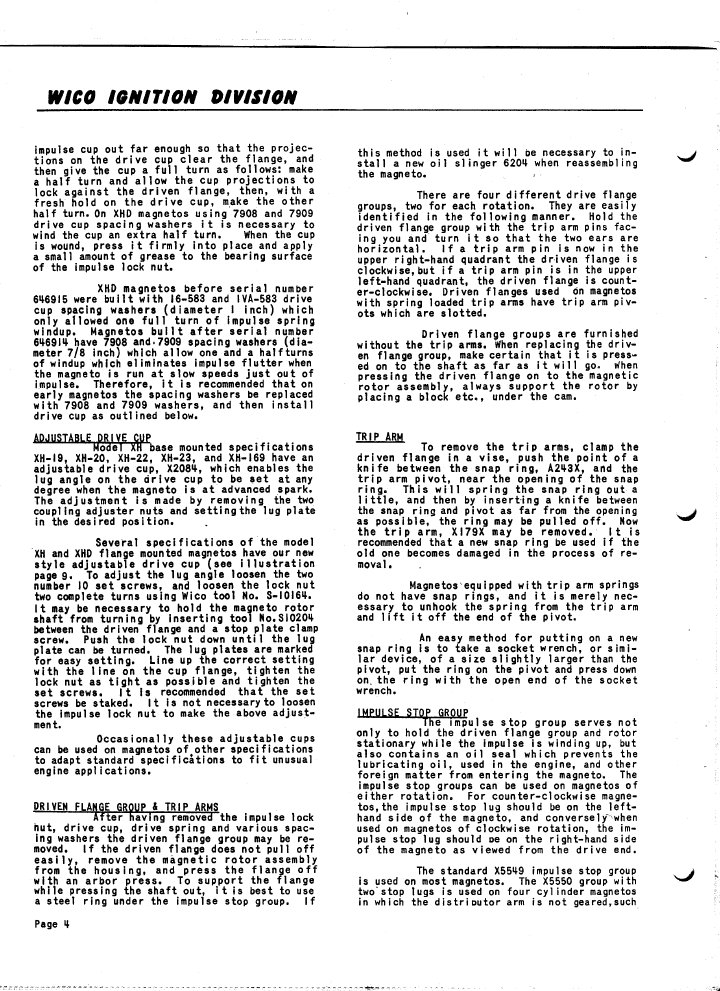
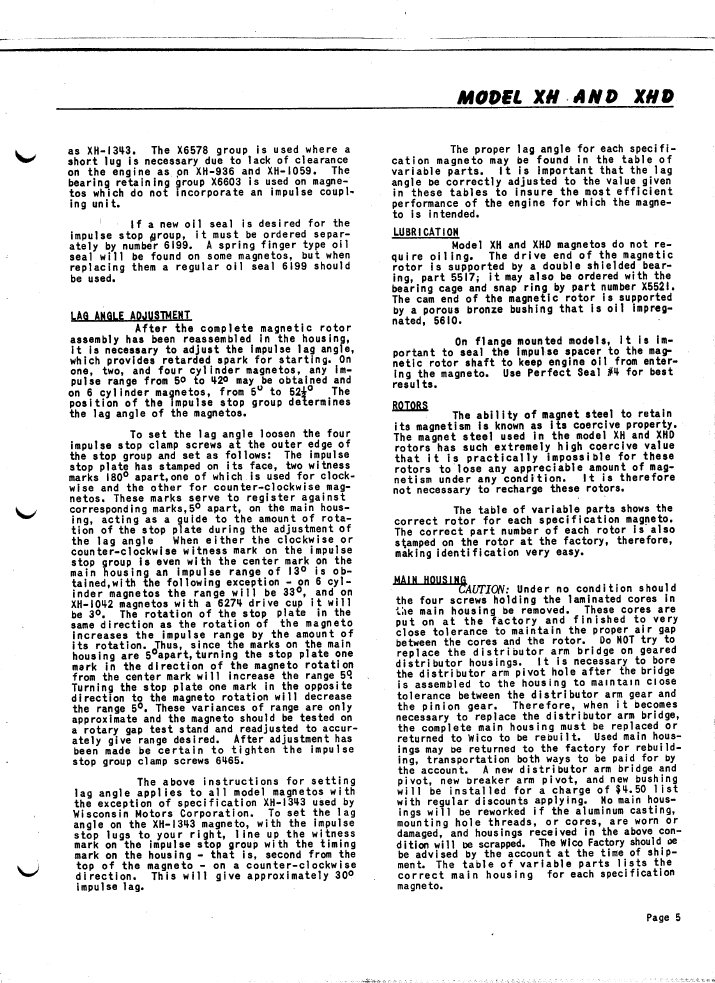
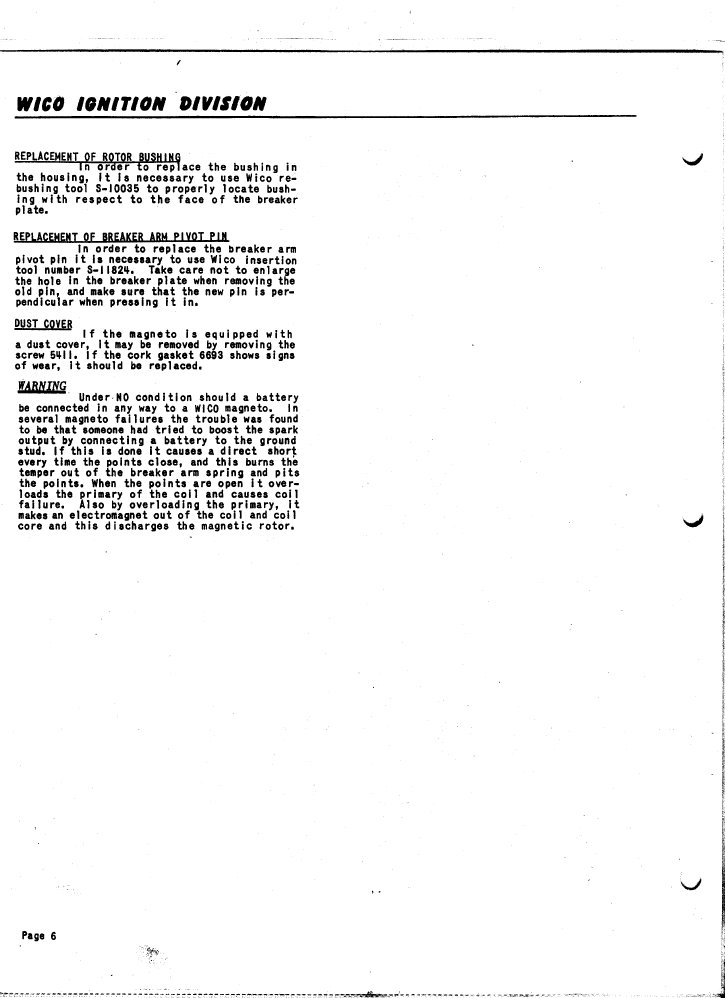
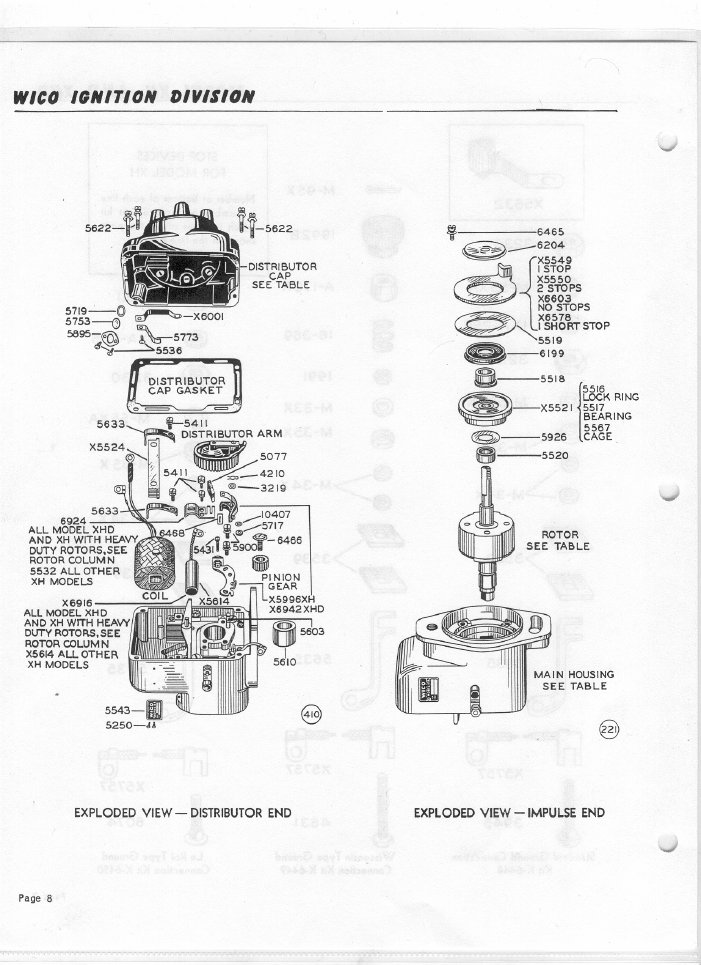
When replacing the bearing(5517) and removing the lockring(5516), move the end lockring in the bearing cage with the end of a punch such that the end of the lockring is near the notch where it can be pried out. If not, it will often break when attempting to pry it out. When servicing the magneto and not replacing the bushing (5610) set the magneto on a box or vise so the rotor shaft is vertical and let some crankcase oil soak into the powder metal bushing carefull not to get it near the points and dab some grease on the cam lobes about the size of a matchhead.
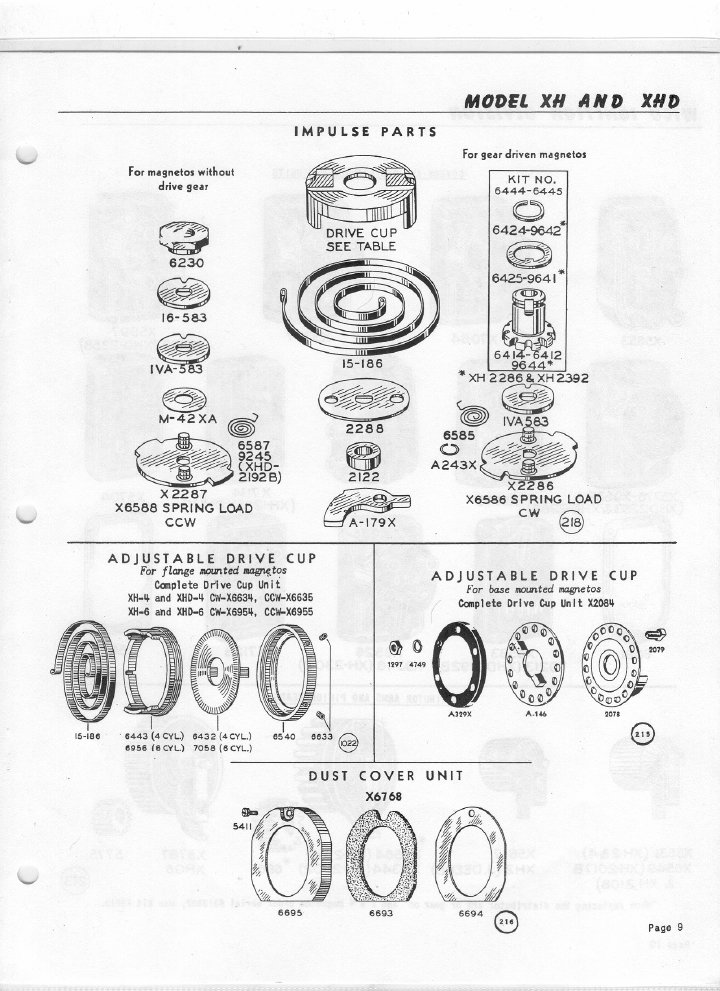
This is helpful to get it all back together. Wash everything out and smear a small amount of grease inside the drive cup where the spring lives. Be sure the pawls swing freely and do not let any grease get on them as it may cause them to hang up and not engage. It is sometimes helpful when reassembling the drive cup and spring to place the two notched washers smeared with some grease in the center of the spring in the cup, then slide them onto the shaft rotating the cup in the direction of rotation winding up the spring till the cup clears the stop ears on the hub then slide the rest of the way onto the shaft. If it does not slide easy, give it a bump with a plastic hammer, then install the impulse nut.
Here is some helpful info on caps and rotors. Nearly all of these are still available but may have different part numbers.
